

The Ins and Outs of Running a Facebook Brand Awareness Campaign
Want to advertise on Facebook but can’t figure out exactly how to get started? Look no further! In this blog post I’ll go over how to create a basic Brand Awareness Campaign in an easy step-by-step guide.
Facebook introduced the Brand Awareness Campaign in late 2015, and has been slowly rolling it out to advertisers in waves. Unfortunately not everyone has access to it yet, but even if you don’t, you’ll be ahead of the game when it does come out for everyone.
The first thing you’ll need to do is create a Business Manager account. If you’re completely new to Business Manager, get up to speed with our comprehensive guide. It’ll walk you through setting up an account as well as giving you a tour of the platform.
Step 1: Creating Your Campaign
After you’ve set up your Business Manager and created your Ad Account, select the “Create a Campaign” Button. 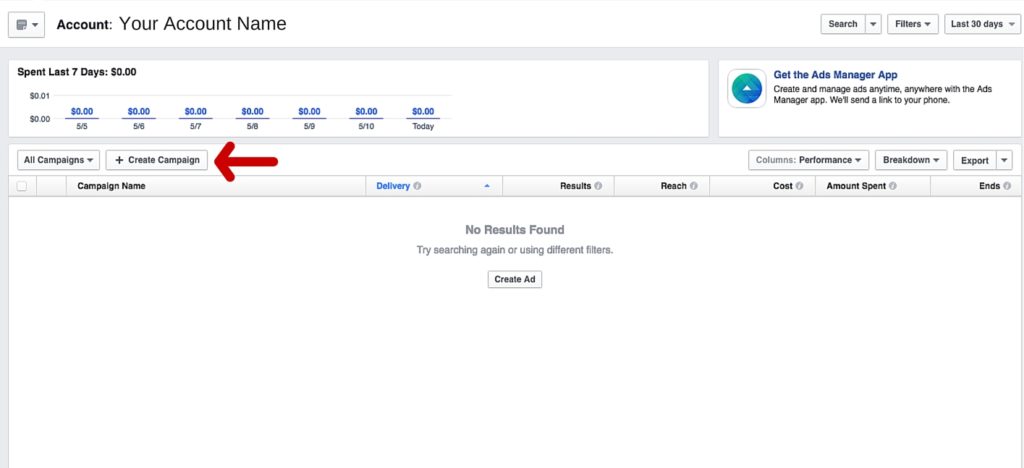
This opens up the Campaign creator.
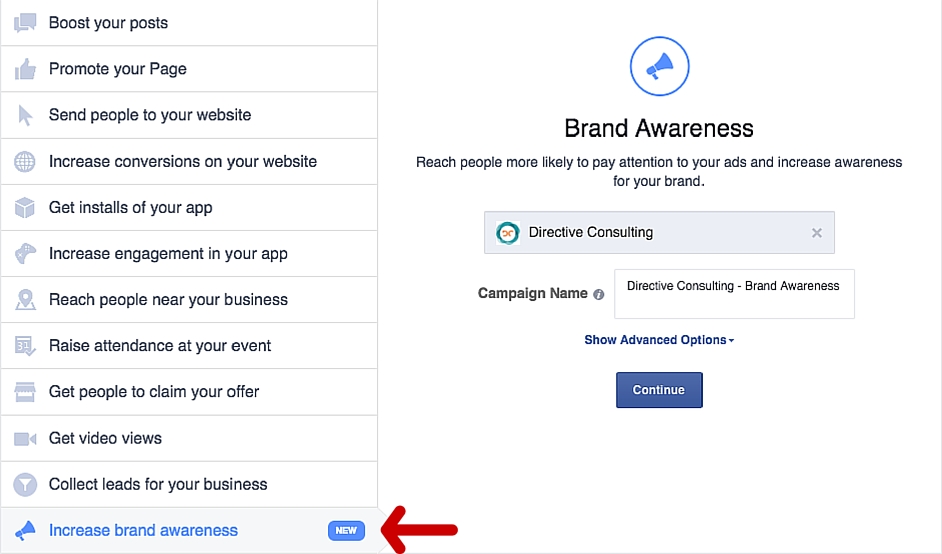
From here you can select what type of campaign you want to run. Facebook gives you a number of different options, but for this walkthrough we’re going to select the “Increase Brand Awareness” campaign featured at the bottom of the list. By hitting the “Show Advanced Options” drop down on the right hand side, you can set a campaign spending limit. Here at Directive Consulting, we usually run our awareness ads continually so we skip this section, but if you’re on a tight budget and want to ensure you don’t go over it I would recommend setting a spending limit. The minimum limit you can set is $100 (although if you’re planning on spending less than that throughout the entire campaign, there’s no need to set a spending limit. The campaign will just stop when it reaches the lifetime budget set in the Ad Set). Go ahead and title the campaign appropriately and hit Continue.
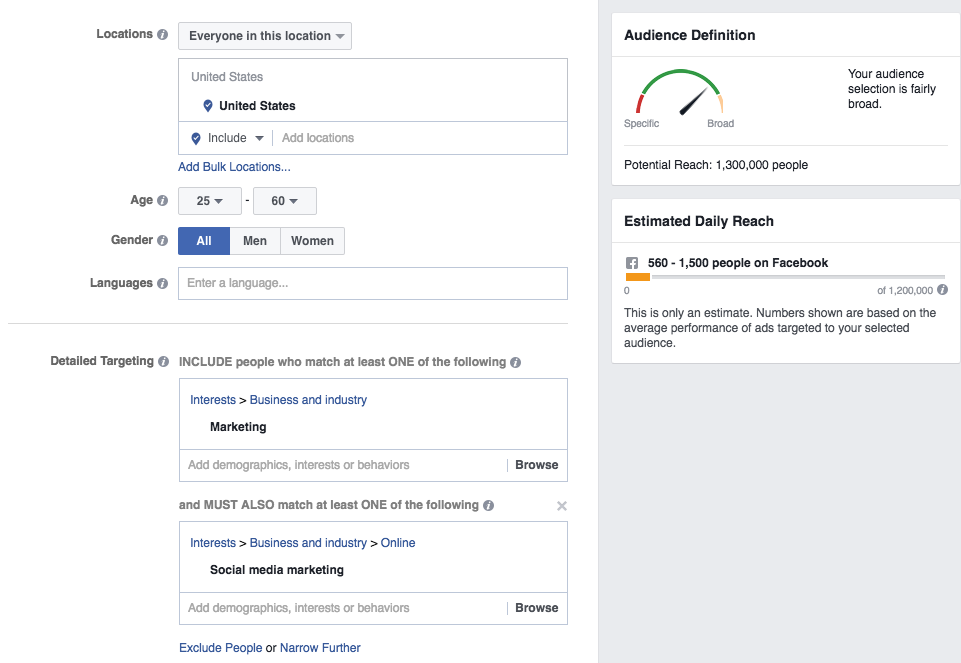
Step 2: Setting Your Audience
Previously, the only awareness campaign option Facebook had was the Local Awareness Campaign, which was effective when it came to reaching a lot of local people, but severely lacked when it came to setting a specific target audience. The “Increase Brand Awareness” campaign gives you the ability to create that specific audience while also targeting their geographic location.
Most of this is self-explanatory, but here’s a breakdown of what it all means:
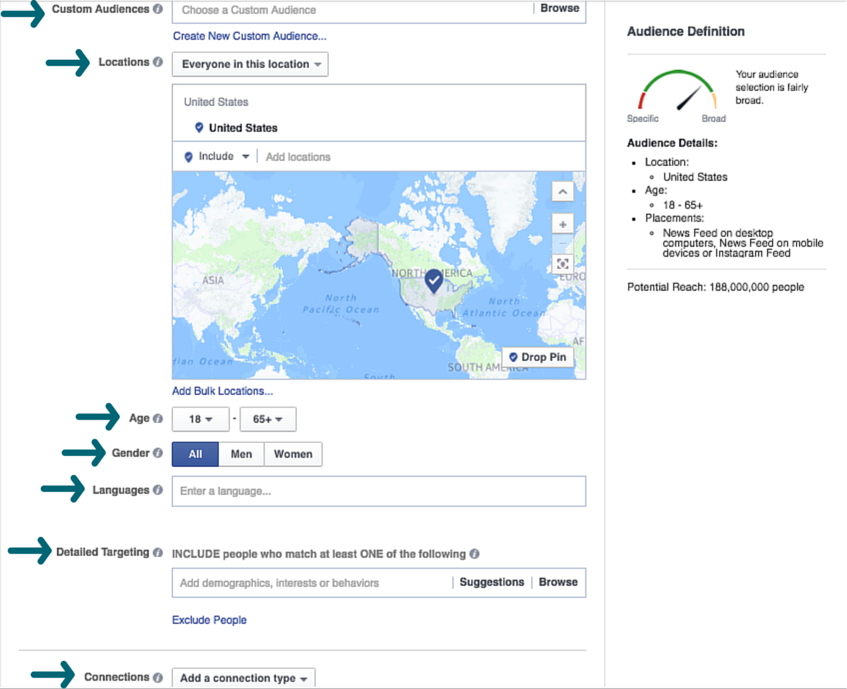
- Custom Audiences: This is where you can add pre-created audiences based off of website traffic or email lists. If you’re not using Custom Audiences, start now.
- Locations: This allows your to target Facebook users based on their geographical location. If you’re a retail store, targeting people within 10 miles of your store would be a good place to start. If you’re like us at Directive Consulting, and do mostly online work, see where the majority of your website traffic is coming from and start with targeting those areas.
- Age: Select an age range for your audience. You can target people from ages 13 to 65 and up.
- Language: Target specific people based on the language they speak (This will automatically target English speakers if left blank).
- Detailed Targeting: This is where you get to really narrow down your audience. Target Facebook users based on Demographics (i.e. income, religion, relationship status, etc.), Interests (i.e. music, baseball, hiking, television, etc.), and Behaviors (i.e. online shopper, real estate investor, high-end retail buyer).
- Connections: Target people who like your Facebook page(s), friends of people who like your Facebook page, or exclude people who like your Facebook page.
In the upper right hand of the Ad Set page you can see the potential reach of people that meets your detailed specifications as well as a spectrum showing you how specific or broad your audience is. I try and shoot for an audiences that’s in the center of the spectrum, a healthy middle between broad and specific.
For building Brand Awareness, having a larger audience is usually best, but make sure your audience is interested in your product in the first place, or else you’ll be wasting money spreading your brand to people who won’t convert. Your potential reach will differ depending on your specific goals, but the three different Brand Awareness campaigns we’re running average a potential reach of around 400,000 people.
Step 3: Budget and Schedule
Below the audience section in the Ad Set is the budget and schedule section.
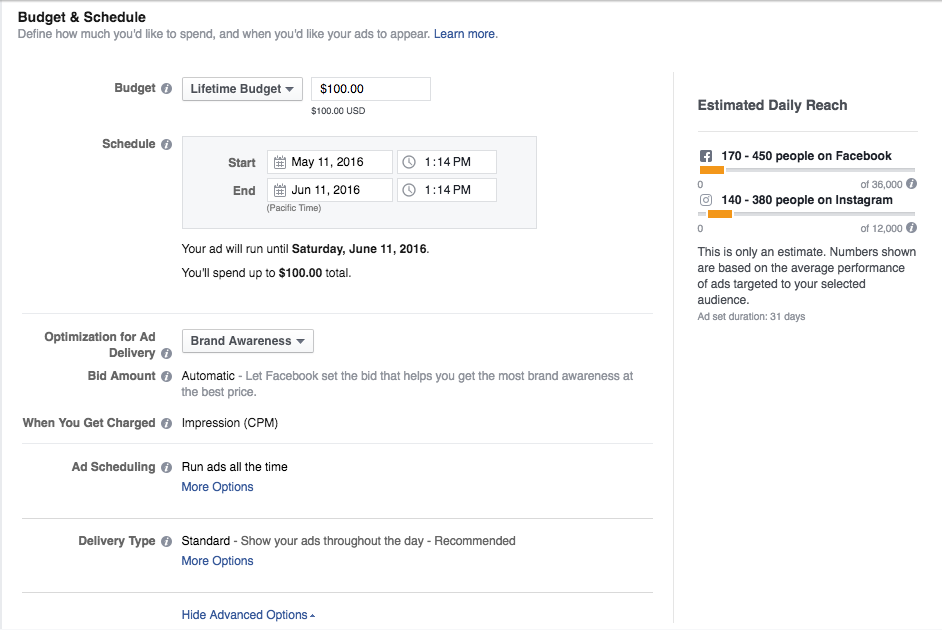
The first thing you’ll want to do is decide whether to have a daily budget or a lifetime budget. At Directive Consulting, we usually use the Daily Budget because our ads run continuously, and it’s a pain to keep upping our budget when the lifetime amount is reached. For both lifetime and daily budgets, the minimum spend per day is $1.00. If you don’t plan on running your awareness ads continuously, you can select a start and end date under “Schedule” (again, keep in mind the minimum spend is $1.00 a day).
On the right hand side you can see the daily estimated reach, which will change depending on the amount of money you’re willing to spend. Keep in mind this is just an estimate, so your actual reach may be lower than the estimation.
The ad optimization can be set for Brand Awareness (as shown above) or Reach (shown below).
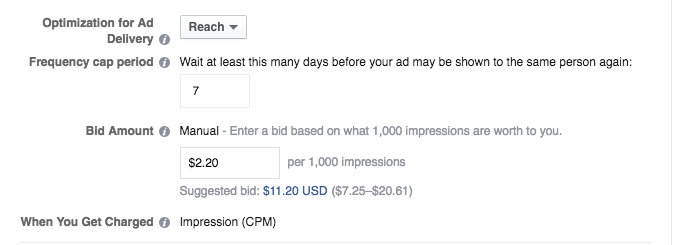
Optimizing for Reach requires you to select a manual frequency as well as a manual bid. Personally, I recommend the Brand Awareness optimization because Facebook will automatically set a bid amount that helps you get the most brand awareness at the best price, which usually gives you the best bang for you buck.
When you’re done with the budget and optimization settings, hit “Continue” at the bottom of the screen.
Step 4: The Ad Creative
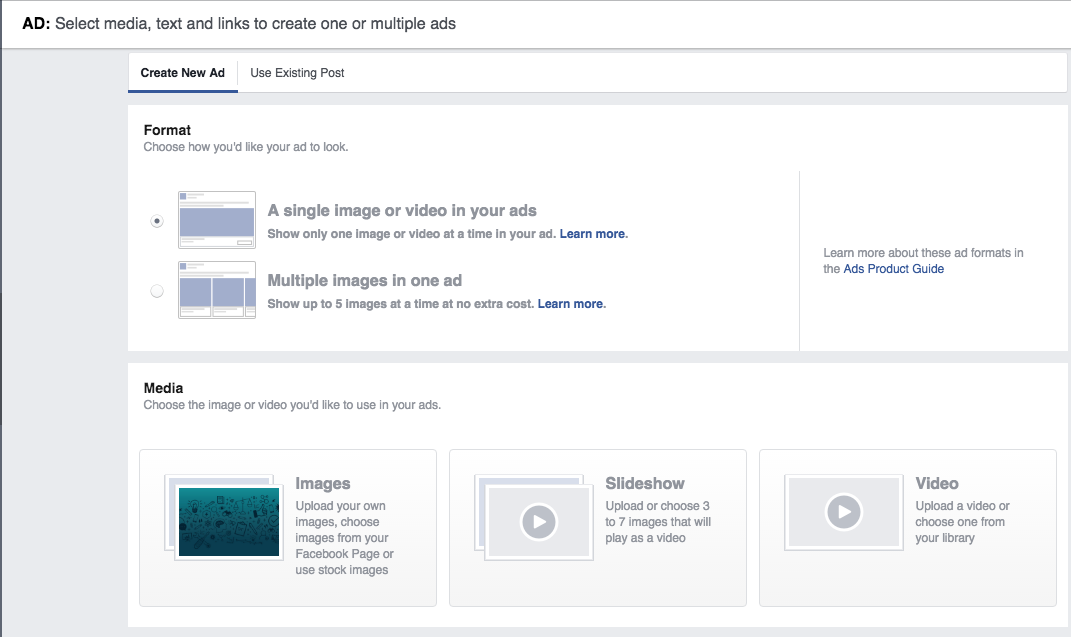
Here you’ll choose which format to use for your ad. As you can see above, you have the choice of a single image or video, or multiple images (which Facebook calls a carousel ad). The most common format is a single image, but if you’re a retailer you could highlight multiple products with a carousel ad. Even at Directive Consulting, we use carousel ads to highlight our work in PPC, SEO, Content Creation, and Social Advertising. Videos can also be a good option because of their auto-play feature, but for this example we’re going to select a single image ad.
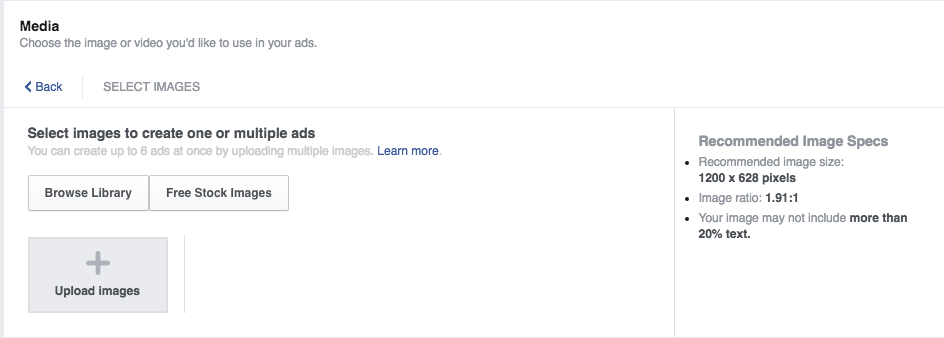
You have the option of browsing stock images, browsing your library of previously uploaded images, or uploading your own new image. If you do upload your own image, it’s important to note the recommending image size of 1200 x 628 pixels and to make sure your ad image doesn’t include more than 20% text. Facebook’s tool is a great way to double check the 20% text rule.
You can add up to 6 images for each ad at no extra cost, which is great for A/B testing, and something I definitely recommend!
When you’ve selected the appropriate ad image(s), you’ll be able to preview it depending on which placement you select (Mobile Newsfeed, Desktop Newsfeed, and Instagram).
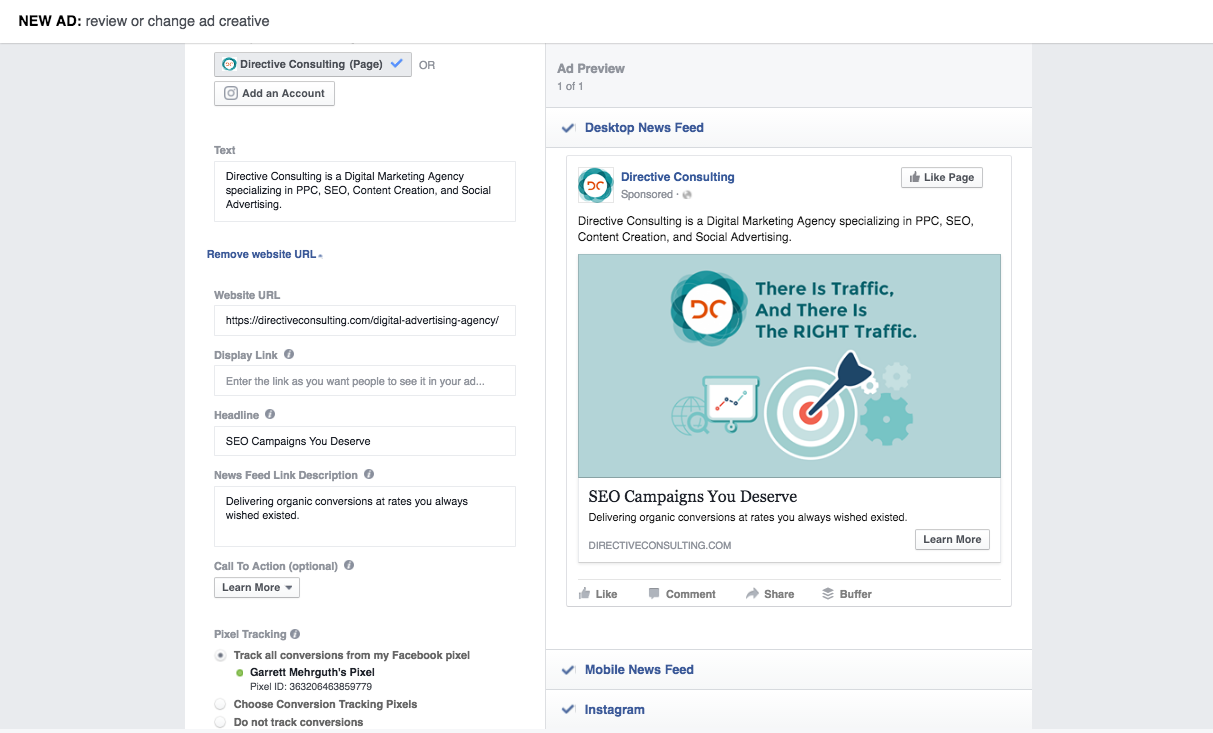
Now it’s time to start filling in your ad copy. Here’s a breakdown of what everything means.
Text: The part that goes as a “status update” above the ad design. (Recommended: 90 Characters)
Website URL: The site the ad directs to when clicked.
Display Link: How the link is shown on the ad.
Headline: The title right below the ad image. (Recommended: 25 Characters)
News Feed Link Description: The short description right below the headline. (Recommended: 30 Characters)
You can add a Call to Action button (i.e. Learn More, Shop Now, Contact Us, etc.) to encourage even more engagement on your ad.
You’ll see below the Call to Action is Pixel Tracking. You can connect a Facebook Pixel (a snippet of code pasted on your website) in order to track conversions and website visits. This is a whole other animal, which we’ll be covering in another blog post soon!)
Want to Increase Leads For Your Business?
We would love to take a look at your current search engine positioning and analyze your growth potential within your industry!
Facebook Ad Testing: The 20% Text Rule
As Facebook advertising has grown over the past few years, they’ve constantly updated and changed their guidelines and rules for ads. Not too long ago they introduced the Brand Awareness Campaign, and the most recent change involves the 20% text rule. Before the change, Facebook required all ad images to have no more than 20% text, so advertisers couldn’t cram in additional copy outside of their headlines and link descriptions. Anytime an advertiser wanted to launch an ad or promote content, we had to use a text overlay tool to ensure our ads met the guidelines, or else they wouldn’t be allowed to run. It looked something like this.
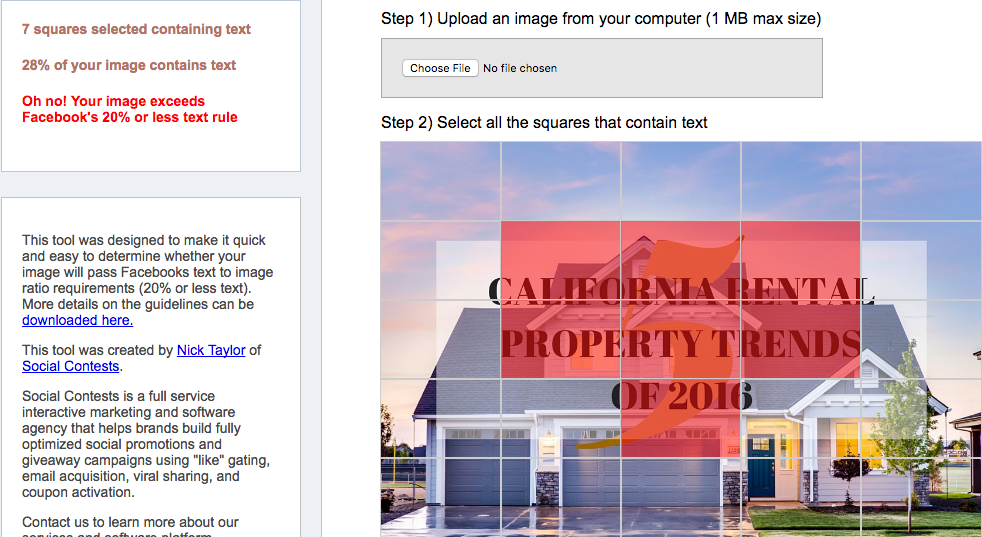
As you can see, the text takes up 28% of the image, and therefore wouldn’t be allowed to run as an ad. Finding the balance between an eye popping and appealing image and keeping the amount of text under 20%. It used to take me multiple tries to get the exact image that I thought appealed to both of those aspects.

The text takes up only 20% of the image and would be allowed to run!
The 20% Change
Recently, Facebook updated their policy to allow images with more than 20% text, but offered up this warning for advertisers wanting to include a high amount of text in their ad images.

While it’s nice that Facebook alerts you when your image contains too much text, this warning is pretty ambiguous. Does Facebook really lower the reach if your image has more than 20% text? That’s the question we wanted to answer, so we set out to discover the answer.
The Parameters of our Facebook Test
http://gmehrguth.wistia.com/medias/j6rfyzwjqr?embedType=async&videoFoam=true&videoWidth=700
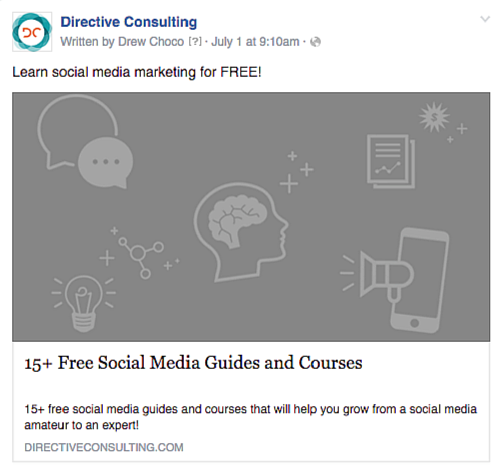
For this test, we promoted a blog article that we wrote which highlights a number of free social media marketing guides. We chose this article because it’s a listicle, which we know from previous experience performs well on Facebook. We began with a broad audience of 1.3 million people who had an interest in marketing and ALSO had an interest in Social Media Marketing.
We wanted at least a million people in our target audience. Facebook can limit the reach of your ads if our audience is too specific. We’ve seen this happen in the past, so although Facebook gives you the ability to be super specific with your targeting, it doesn’t always benefit you. By being too specific, we have seen such a low amount of impressions that our CPM was close to $40. We ran three different ad sets with the same audience and same budget to ensure the only change was the amount of text in the ads. The three different ad images are below:
With this in mind, we ran three different ad sets with the same audience and same budget to ensure the only change was the amount of text in the ads. The three different ad images are below:

We launched these ads simultaneously beginning on July 1st, and ran them for a week, ending them on July 8th. We created individual ad sets for each image so that the budget and reach would be spent evenly. If you launch different ad images in the same campaign, Facebook will automatically try and optimize that campaign, so the ads that have the most engagement at the beginning will be shown more, and take more of the budget than the ads that didn’t see as much engagement. We wanted everything to be completely identical, from target audience to ad copy, with the only changing variable being the amount of text in the featured image. We spent $33 per image, coming in at just under $5 per day.
We wanted everything to be completely identical, from target audience to ad copy, with the only changing variable being the amount of text in the featured image. We spent $33 per image, coming in at just under $5 per day.
The Results

We saw some very interesting results from this test, and I’ve got to be honest, it was a little different than what I expected going into this experiment. One thing that held true that I was expecting was the large text image reaching the least amount of people. However, it wasn’t nearly as low as I thought it was going to be. With almost 44% of our ad image covered with text, it only reached 197
One thing that held true, which I expected, was that the large text image reached the least amount of people. However, it wasn’t nearly as low as I thought it was going to be. With almost 44% of our ad image covered with text, it only reached 197
With almost 44% of our ad image covered with text, it only reached 197 fewer people than the image with no text, and 663 fewer people than the medium text. One thing that was interesting was the amount of engagement we saw across the different images. The full results can be seen below:
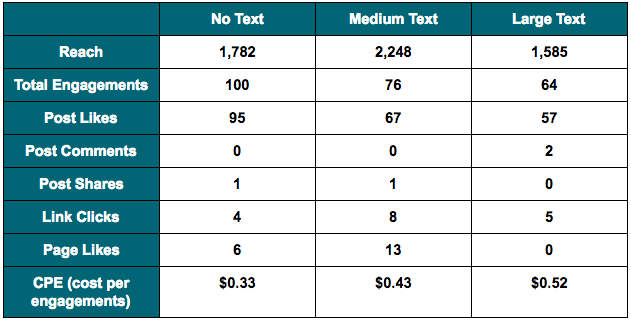
Even though the medium text image reached nearly 500 more people, it had 24 less engagements than the image with no text. Obviously, this means the cost per engagement was lower as well. However, we did notice that the medium text image led to more link clicks and page likes, which I think most every Facebook marketer would agree, are much more valuable than just post likes. The most decisive thing we learned in this test is that having more than 20%, or in our
However, we did notice that the medium text image led to more link clicks and page likes, which I think most every Facebook marketer would agree, are much more valuable than just post likes. The most decisive thing we learned in this test is that having more than 20%, or in our case nearly 50% of our image covered in text, definitely hurts not only the amount of people reached, but also the amount of engagement.
Our Conclusion
This was a very telling test, and provided a lot of good information not only on how the amount of text affects reach; but also, how it affects engagement. We can definitely see that the reach is affected when the ad image includes more than 20% text, and we can safely assume that if you upped the budget, the difference in reach would be much more drastic.
When it comes to engagement, this test definitely isn’t a tell all. Our images, while on brand and creatively designed, probably aren’t going to get as much engagement as a picture of a beautiful sunset or a 15-foot shark breaching the sea.
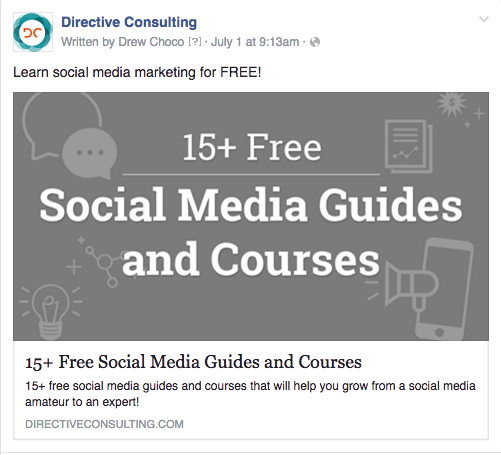
However, it’s safe to say that including SOME text on your ad images is a way to drive more engagement. Naturally, our eyes and attention are drawn to images more than words. Adding a small amount of text ensures that people’s attention is still driven towards the image, but there’s a better chance they’ll click on the link because the image now tells them what to expect from the article.
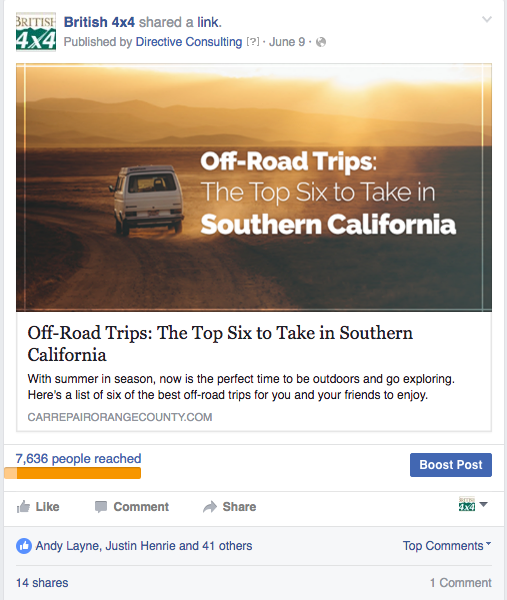
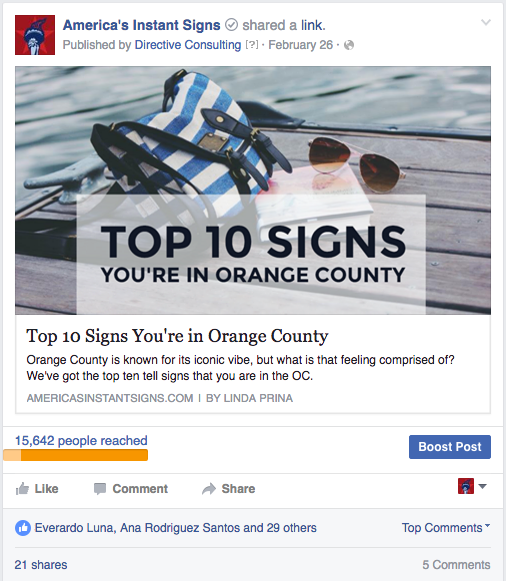
If you also look at our results, the image with a medium amount of text (still under 20%), brought more traffic to our site, more traffic to our Facebook page, and resulted in a share as well. Below you can see some examples of posts we’ve promoted for clients that have done extremely well on Facebook, and have a nice balance of captivating images and enticing text.

When you’ve completed everything and made sure your ad looks exactly the way you want it hit the “Place Order” button at the bottom of the screen. And that’s it! You’ve just created your first brand awareness campaign. If your campaign doesn’t immediately go live, don’t panic. Sometimes it takes Facebook up to 24 hours to review the ad and make sure it’s compliant to all of their ad guidelines.
Now that you’ve created your first campaign, don’t just rest on your laurels, optimize them! Split test using different ad images or ad copy, analyze for a week, then try something new!


