


Looking for instructions on how to set up Google Tag Manager (GTM) on your WordPress account?
In this short guide, you’ll discover two ways to set up Google Tag Manager and connect other Google services to your WordPress account.
[optin-inline id=’obcxths3msxl2zirkkwi’]
What is Google Tag Manager?
Google tag manager is a free service provided by Google that allows digital marketers to create, manage, and deploy marketing tags and tracking pixels on their websites without any prior knowledge of HTML or CSS coding languages.
With tag manager, marketers can set up customized marketing tags on individual pages that may be triggered by specific user behaviors. Tags can be used to gather data about specific actions on your website – things like PDF downloads, shopping cart abandonment, exit link clicks, scroll depth monitoring, and more. The data you collect can be analyzed using Google Analytics to inform your user experience and conversion rate optimization decisions.
How to Set Up Google Tag Manager in WordPress
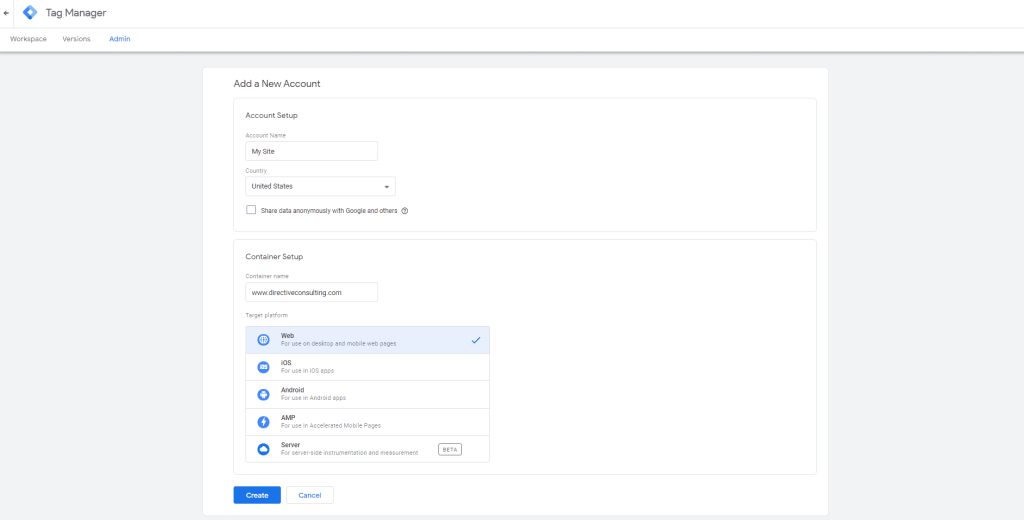
To get started, you’ll need to visit the Google Tag Manager page and create an account. You’ll be asked to choose an account name and set up a container based on your target platform.
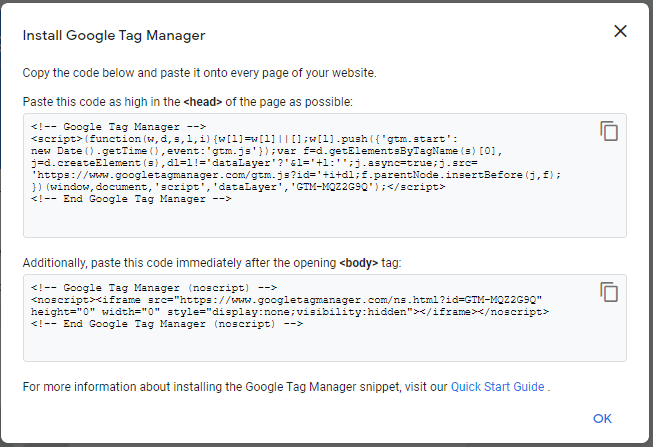
After setting up your tag manager account, you should immediately see a pop-up with instructions for installing Tag Manager on your website. You’ll be given two tracking codes: one that goes in the head section of every page on your website, and another code that goes in the body section.
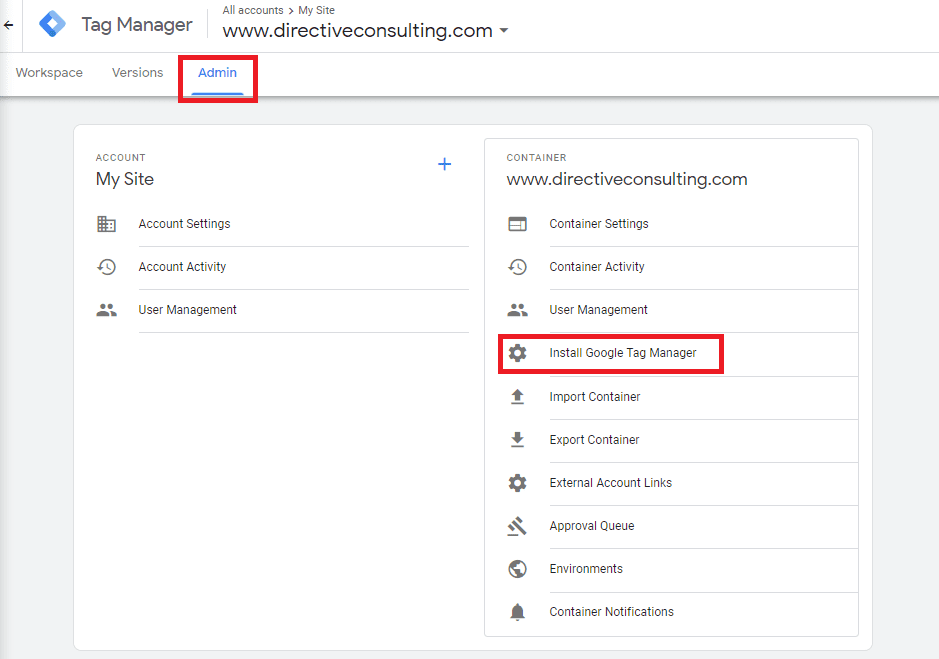
If you already closed this pop-up, you can access these codes again by clicking on the “Admin” tab and selecting “Install Google Tag Manager” next to the cog symbol.
To successfully install and enable Google tag manager on your website, you’ll need to ensure that your GTM code snippets are correctly pasted onto every page of your website. Doing this manually would be extremely time-consuming, especially if your website has a lot of pages – instead, this guide will show you 2 ways to set up Google Tag Manager on your WordPress website without having to insert your code snippets into each individual page.
Method #1: Manual Set-Up
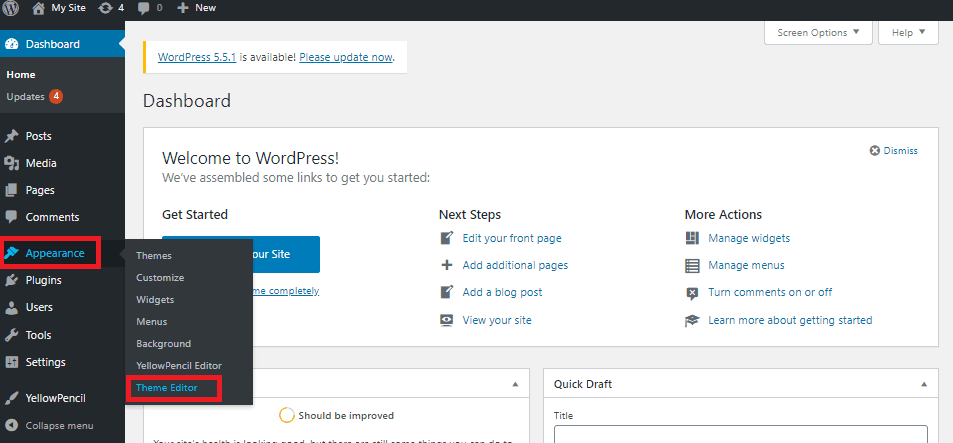
To install Google Tag Manager throughout your WordPress website, you will need to make use of the theme editor. You can access the theme editor from the dashboard of your WordPress website by hovering your mouse over “Appearance” in the sidebar and selecting “Theme Editor” from the menu.
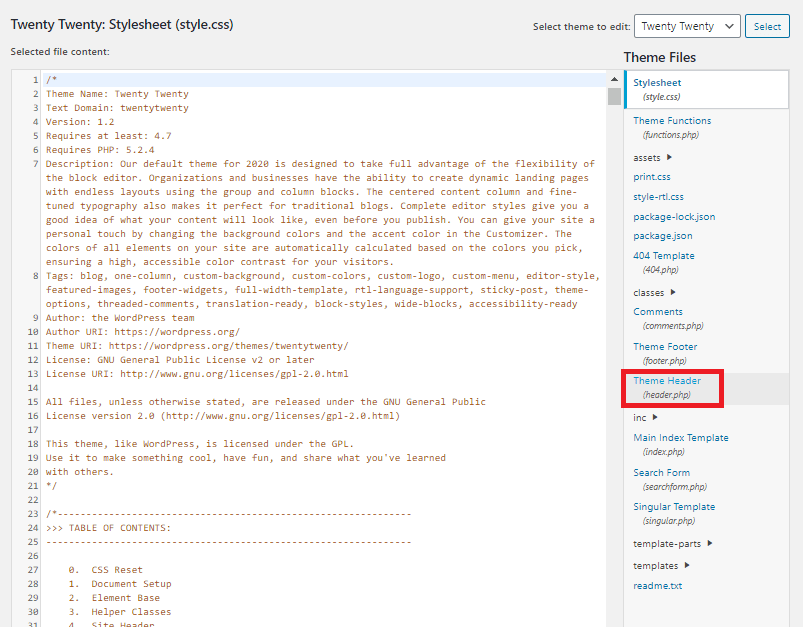
Next, scan the list of theme files available on the right side of your screen and find one with a name like “Theme Header (header.php)”. This is the file that you’ll need to edit to install your GTM code snippets.
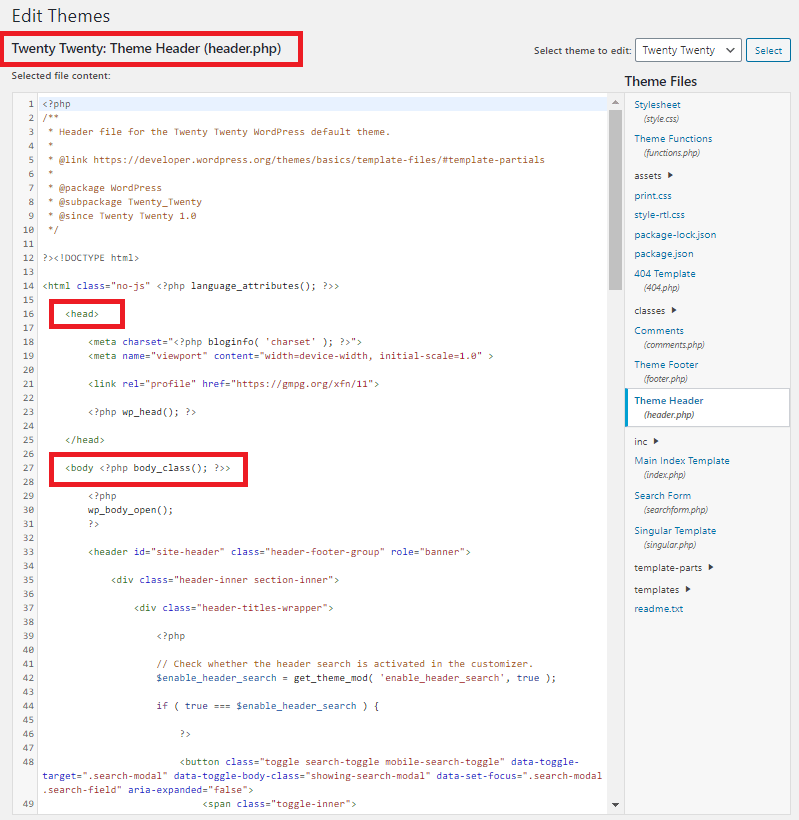
Once you’ve opened the Theme Header file, you should be able to locate the <head> tag and the <body> tag. We’ve highlighted them in red in this example image.
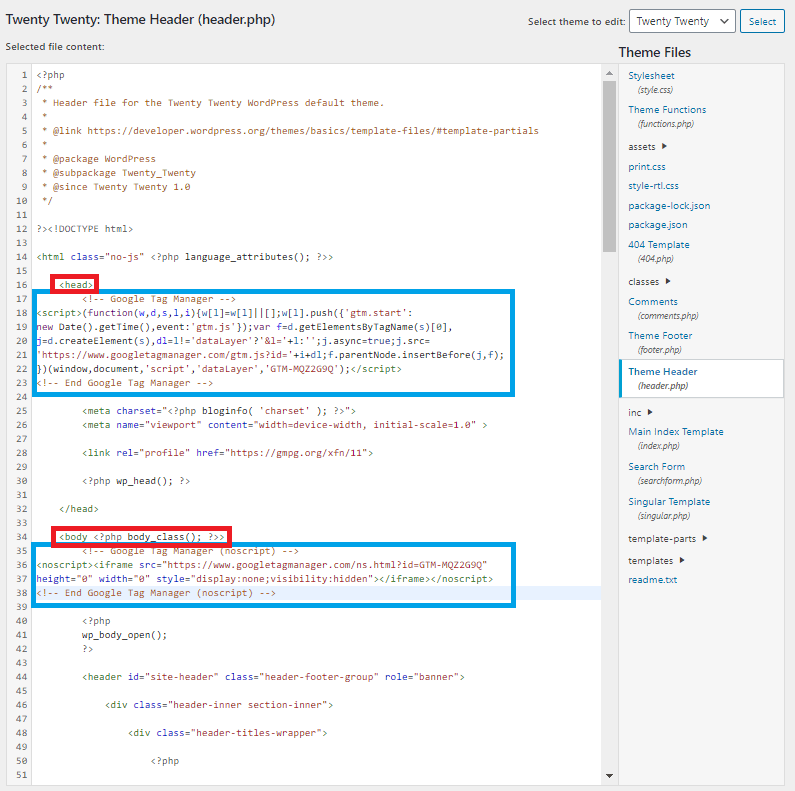
To complete the installation process, paste the first code snippet from tag manager under your header tag and paste the second code snippet under the body tag. Your final result should look something like this:
At this point, you can complete the installation process by clicking the “Update File” button at the bottom of the page.
This manual method of installing Google Tag Manager is quick and easy, but there is one drawback – anytime you reinstall or update your theme, your code snippets will be deleted and you’ll need to re-install GTM on your website.
A common workaround for this involves the creation of a child theme, a special sub-theme that inherits features and functionality from a parent theme while applying its own customizations.
If you’d rather avoid having to do this, keep reading to find out about the next method for setting up Google Tag Manager on your WordPress sites.
Method #2: Using the Google Tag Manager for WordPress Plugin
Some digital marketing professionals prefer using a WordPress plugin to manage their Google Tag Manager installation.
Google has released a WordPress plugin known as Google Site Kit for exactly this purpose. Site Kit simplifies the process of setting up Google tools and applications on your WordPress website, making it easier for an administrator or manager on your WordPress account to add google tag manager code snippets and connect other Google Services like Optimize, Analytics, AdSense, and more.
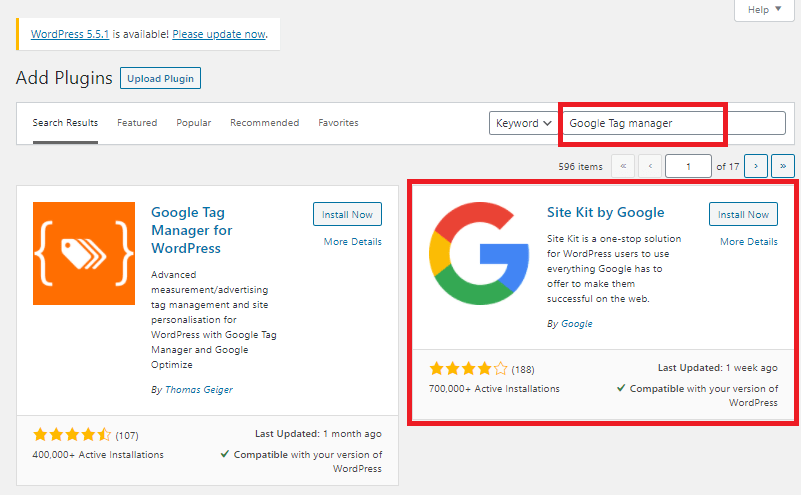
Get started by hovering your mouse over “Plugins” in the sidebar and selecting “Add New”. Enter Google Tag Manager into the search bar and you’ll find a selection of plugins that can be used to complete the set-up process, including the Site Kit by Google plugin.
Click on “Install Now”, wait for the installation to complete, then click on “Activate” to start using Google Site Kit.
Next, you’ll need to complete the set-up process by verifying ownership of your website, giving permission for data sharing between your WordPress website and your Google account, and setting up Google Search Console. The verification steps here don’t require any special instructions – you’ll just need to sign in to your Google account.
After completing the set-up process for Site Kit, you’ll be able to visit the Site Kit Settings page where you can connect additional services, including Google Tag Manager. Hover your mouse over “Site Kit” in the sidebar, then select Settings and click on the tab that says “Connect More Services”.
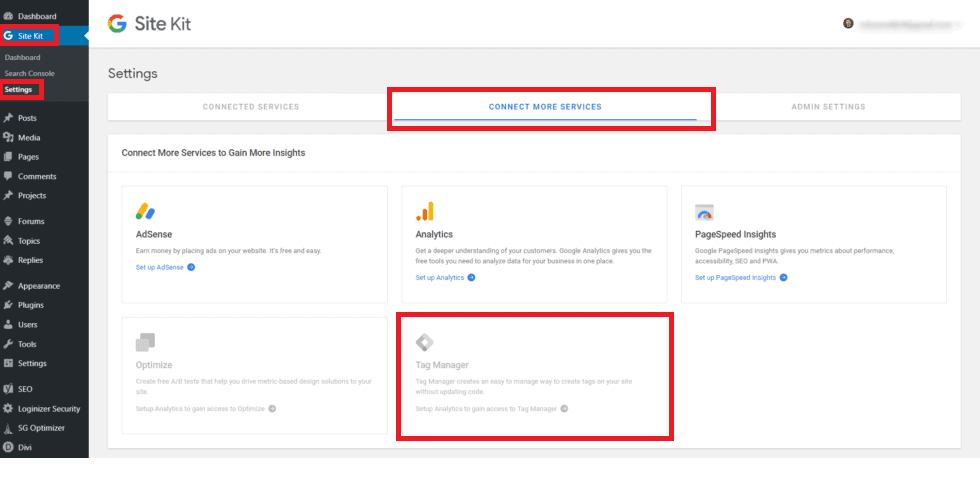
Here, you’ll be able to select Tag Manager and install it on your website using Google Site Kit – all without modifying any code or writing any custom HTML. Your Google account is already linked to your WordPress website, so it’s simply a matter of choosing which tag manager account and container you’d like to use.
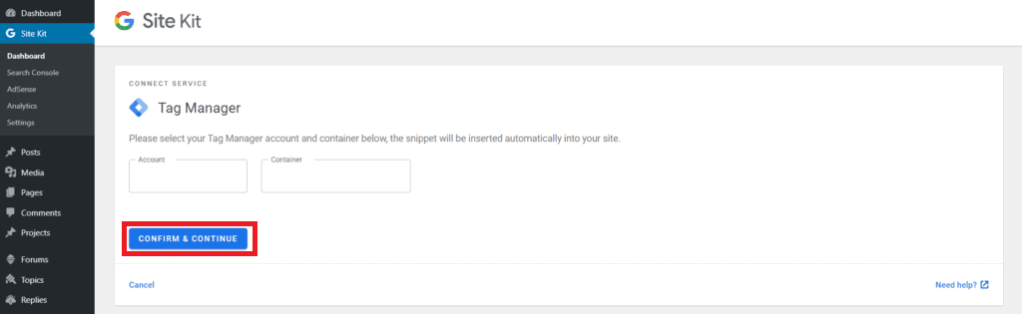
Once you click on the “Confirm and Continue” button, you’ll have finished the setup process for google tag manager on your WordPress account using the Site Kit plugin.
How to Verify Your Google Tag Manager Installation in WordPress
Now that you’ve completed the set-up process for google tag manager, how can you be sure that your implementation worked?
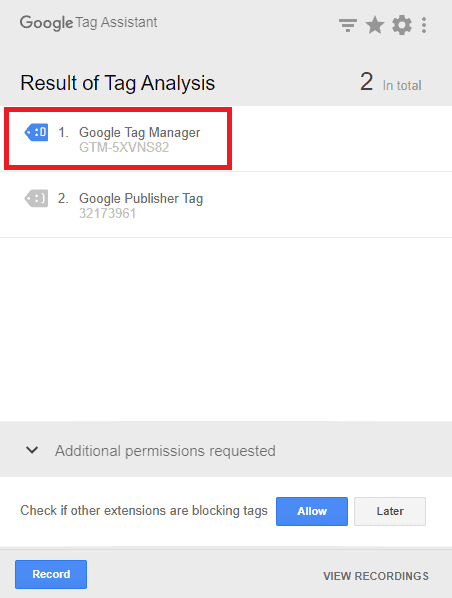
Visit the Chrome Extension store and download the extension called Google Tag Assistant.
With this free tool, you can navigate to any page and you’ll be able to see which tags are active on that page. Once you finish installing your tags, you may visit your own web page using the Google Chrome browser and check the Google Tag Assistant to make sure your tags are installed correctly.
Summary
If you’re a digital marketer, Google tag manager can be useful for measuring user behaviors and tracking events to gain insight into how you might improve user experience or conversions on your website.
In this guide, we covered how to set up Google Tag Manager by manually editing your WordPress theme or by using the Google Site Kit plugin. Whichever method you choose, we hope you’ll start using Tag Manager to understand more about your target audience, drive more conversions, and achieve marketing success in 2020.